Thursday, April 24, 2014

Next project: Momtrepreneur?

I guess you can say I've always enjoyed creating things and seeing (and loving) the process of turning an idea into an actual real-life product. I've had a few ventures here and there, some more successful than others, and I've always found joy and satisfaction from each of them and the profit on the side, a bonus!


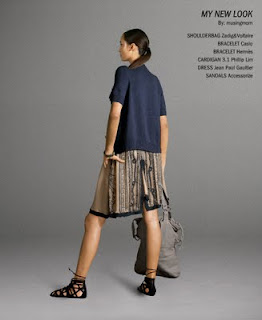
This isn't me, hahah! Thanks for modeling sis!
After giving birth to baby girl #3 late last year, (yes my blogs come years apart for obvious sleep-deprived reasons, hahaha!), I thought this creative business bug went into hibernation mode, and understandably so.  

But, lo and behold, the bug has resurfaced!  My sister-in-law's friend asked her if she knew anyone who could help provide products for an online selling website she was planning and my sis-in-law (thanks Jo!) threw my name at her direction. 

Wow! Thank you, Lord! You really are the one who steers our lives and opens doors, I neither sought this out nor even had the motivation or inclination to even think of it--so I really credit You for all this. 

So the long and short of it is, here it is! My very first accessory line! Lord, you never cease to surprise and amaze me. Thank God too, I have a pretty sister who can double as a model (and doesn't mind getting paid in food!), thanks Tinni, you're the BEST! 

Please text me for orders at 0998-976-7220 or check out www.ni-qua.com. (online selling for this line will begin April 29, 2014)


Introducing Baja Blu...

Malasimbo Blue (frosted and matte glass beads)
Ojai White (albino barrel wood/faceted acrylic)


Coachella (cream/neon yellow faceted acylic)

Woodstock Citrus (dark wood/translucent acrylic)

Woodstock Tangerine (tubular wood/faceted acrylic)
Malasimbo Cream (frosted glass beads/faceted acrylic)


Lollapalooza (multicolor faceted acrylic)


Friday, May 11, 2012

Surviving 'Moving Day'

My husband and I have been married 6 years, and I’ve realized that we’ve moved residences 4 times. The first move was easy, four months pregnant with our first daughter, all we had to concern ourselves with was making the transition (and the packing) as a couple--our biggest challenge being that we didn’t lose granma's silverware. Once the kids started coming, moving day became a major physical, emotional, psychological production—and I’m not even talking about the kids yet!

Here are some tips we’ve learned along the way, that has made Moving Day less about tears, tantrums and jarring adjustments (for the kids as well!) and more about looking forward to an exciting new adventure.

1       Prepare Them Beforehand
I can’t emphasize this enough—mentally prepare your child a week before to help make the transition as painless as possible. 
a.     While packing their things away, leave him/her with some familiar items that’ll ease the transition. Setting special items aside now will save you the headache later on of frantically searching through box upon box for “Teddy” while your adjusting toddler screams in the background.
b.     Give them something fun to look forward to: “You know when we move houses next week, you’re going to have a new room, what color do you want to decorate your room with?”
c.      Involve her in the process: “When Daddy and I go shopping for a new TV/sofa/bed/refrigerator, do you want to come to the store and choose with us?”
       
           Make It An Adventure
a.     Highlight an “asset” in your new place: her new pink room, a pool, a playground, a nearby park to visit, closer to playmates, grandparents etc
b.     Tour her around her new place and neighborhood: “See our new kitchen? I can put all of your juice packs in here and you can sit in your chair here with Mummy and Daddy” or “Look, our neighbor has a cute puppy, do you want to say hi to the puppy?”
3           
           Familiar Sights, Sounds and Smells
Nothing’s more comforting in unfamiliar surroundings than the scent of her own pillow, touch of her favorite snuggle toy or sound of her bedtime lullaby. Make sure to have these ready for her first night in her new home. Place something familiar in her crib/room for bedtime to make her new sleeping quarters seem more like home—beddings, stuffed toy, blanket, a familiar nightlight, music box—whatever she has lived with and slept with her whole life. Read the same bedtime books and try to have the same night-time rituals.
      
                  Help Her Stake Her Claim  
“This is your beautiful pink/blue/purple room (a little excitement and exaggeration can’t hurt), you can put your toys here in your toy chest and your clothes and shoes here in your new closet. You can also play here with your favorite toys, look Teddy already found his spot on your bed, isn’t this nice?”
         
            Choose a New Item She Can Bring Into Her New Room
It doesn’t have to be expensive. In our daughter’s case, it was a small rug in her favorite color pink that she got excited about bringing into her new room. In our previous move, it was flower decals to stick on her wall. Involve her in choosing one or two special items to bring into her new space.

Last but not least, an important tip for parents, gone are the days when you’ll have the time, the luxury or the energy to organize every single item in every single box pre-move, what we discovered made packing less traumatic for us was packing and labeling boxes per room (ie: Kids Room, Master’s Bathroom etc) and then briefly scribbling down a general list of things inside (ie: Kids Room: toys, beddings, Master’s Bath: toiletries).  So that when the movers brought our things into our new home, we just pointed them to the appropriate room and just unpacked later on.

Happy moving!


Sunday, March 13, 2011

Morning Sickness, Be Gone!

When I found out I was pregnant with baby #2, I was ecstatic! My previous pregnancy with daughter #1 went by without a hitch—no morning sickness, easy progression, minimal swollen ankles, textbook labor—so imagine my dismay when at 8 weeks with daughter #2, I found myself having debilitating bouts of nausea. 

The dreaded morning sickness reared its ugly head from then on to halfway through my fourth month. Just feeling the vibrations of pushing a cart through the grocery store was enough to send me into gagging mode—bumps on the road, getting up suddenly from a reclining position or even just seeing the swaying motion of clothes hanging on a store rack were enough to make me want to close my eyes and brace myself for another series of queasiness and gagging. 

I felt weak, unsteady and already at the point of mentally telling myself that this little one would be my last.

At the peak of it all, I sent an online shout-out to my fellow moms and begged for remedies (homemade, store-bought, mental exercises or otherwise) and got the following list that helped me through my morning, afternoon and evening sickness. 

I hope this helps all you struggling moms out there!

1.     Nibble on crackers: the dry, starchy kind helps neutralize stomach acids
2.     Eat several small meals a day: six small meals a day are better than three big
     ones and kept my hunger pangs and sugar level at bay. A hungry stomach is a
     queasy stomach.

3.     Avoid oily, fried and hard-to-digest food: your stomach is already in turmoil, keep your meals simple and easy-to-digest (ie: fruits, steamed vegetables, simple sandwiches, bran muffins etc)

4.     Eat hard candy: citrusy hard candy or lollipops that can be sucked through bouts of nausea really help control the urge but caution to eating too much of the sweet sugary kind—stick to natural and organic, if you can. Or better yet, freeze natural citrus juice in an ice tray and slowly suck on a cube when nausea strikes.

5.     Lessen or better yet avoid stress: stress has been known to trigger gastrointestinal symptoms and increase stomach upsets

6.     Take plenty of liquids: Do this especially if vomiting, to replace fluids lost. If liquids are the only thing you can hold down, make sure you’re getting as much nutrition as you can from each glassful. Try soups, broths, fruit or vegetable juices even milk shakes. But if liquids make it worse, stock up on food with high-water content in the form of fresh fruits and vegetables—melons, oranges, apples and the like, served cold, can alleviate the symptoms.

7.     Drink ginger tea (aka Salabat) : the cool, soothing taste have helped a few moms ride through this phase. Do it at home by steeping ginger slices in hot water for 3-5 minutes--depending on how strongly you like it--then sip slowly for relief.

8.     Use aromatherapy: for smell-sensitive moms, please test this first before going all out but it’s been known that peppermint essential oil can alleviate the effects of a queasy stomach. Place a few drops of oil in a large bowl of hot water. Rest beside it and breathe in (hehe, do NOT drink) leisurely. You may also use an aromatherapy diffuser.

9.     Rest up: your pregnant body is working overtime right now (and getting used to an onslaught of hormones) so get a few extra hours of sleep and relaxation to help your body do its job of preparing for baby.

10. Lastly, focus on your growing baby: you'll be seeing her/him in a few more months--this will all be worth it, believe me!


Friday, March 11, 2011

The (Maternity) Transformers

Your changing body doesn’t have to mean a major change in wardrobe. As the weeks start whizzing by from the first moment your pregnancy test comes back positive, you don’t have to spend big bucks on clothes you’ll only be wearing for a few months.

These three clothing gadgets can transform what you already have and give your existing wardrobe the mileage you’ll need to take you practically through the whole nine months (and beyond).

1. The Bra Extender
            As your belly grows, prepare to have cleavage (that is, if you don’t already have one!) on the horizon. Add a few precious inches of breathing room to bras you already have with this ingenious piece of fabric.


Armed with extra hooks and eyes, the extender easily attaches onto the bra’s back closure and accommodates the natural blooming of a mom-to-be’s body.

As the mom’s body expands to prepare for the baby—and breastfeeding—then normalizes after weaning, your bra does too! Perfect during and after pregnancy. They usually come in sets of 3 of nude, white and black of varying widths. Available at Maidenform or your local bra distributor, I found cheaper versions at Sogo and Bench outlets.


2. The Belly Belt
As waistlines stretch beyond your roomiest pair of jeans, this mommy invention will help take you through the most awkward stages of pregnancy with just a button and a tuck.

The Belly Belt Combo by Fertile Mind is the brainchild of an Australian mom who didn’t want to invest a lot of money on maternity wear. The result: a practical belt/fabric panel combo that attaches to the top button (or slide fastener) of your regular pants, skirts or shorts and discreetly covers the exposed tummy area with a fabric panel.

Just match with a flowing blouse or long top and voila! you’ve got bottoms from your closet that still fit! Each pack comes with three fabric panels (denim, black and white) and four fabric belts (2 with buttons and 2 with slide fasteners).

It’s a little pricey but a must-have when it comes to easing you into your new body. Check out http://www.belly-belt.com, just click on the Find Store button for the country you’re in for the store in your area.

3. The Tube Top
Ask any expecting mom about her shrinking top collection and you’ll find that at least half of her tops will be useless by the time baby’s 5th month rolls around.

The answer: the simple tube top. A stretchy tube top that covers the whole torso (pre-pregnancy) can go both ways: as a bra alternative or as a tummy cover-up.

For the latter, layer the tube top under your favorite shirt/blouse and “lengthen” the hem of your now too-short top. 

With the bottom part of the tube top peeking out from under your regular shirts, a two-layered look is created—effectively hiding the tummy. Yay!

This goes hand-in-hand with the Belly Belt since this hides your bursting zipper closure. Play around with colors and prints for more variety. Find these at your local department stores (or your closet!) and buy their biggest size to take you through the next trimesters.


Thursday, March 10, 2011

Back From The Dead

I'm baaaaack! The year 2010 was but a blur in this mom's eyes since that was the year I became a two-time (or is it second-time) mom! Found out I was pregnant in January, thought we were having a boy in May then had a bouncing baby girl weighing 6.12 lbs in September!

We are in love once again and named our newest cutie, Maja (pronounced Ma-ha) which means sweet, charming and "cute" in Spanish. A name that fits her so well, we credit divine intervention for giving us the perfect moniker (Maja at 3 months is pictured below with my then sleep-deprived husband).

To keep you, my one and only follower, up-to-date, I have kept myself busy these past few months writing for an online website which translated my entries into four different languages (woohoo!). Hence the year-long absence since I figured writing for bucks was a pretty good reason for the hiatus.

This is all very exciting, of course, but wish I could understand my published blogs, hehe. Yahoo! Asia published 12 of my blogs in their BabyCenter website and can be read in Indonesia, HongKong, Taiwan and Thailand! Amazing.

To date, they were published last July, August and September 2010 so it's safe to say I can finally post them here in easy-to-read English! Yay! Please excuse the slight change in tone since I had to write it in translatable (fewer slangs, less expressions) English. So please read on, my faithful follower. I hope you enjoy reading them as much as I enjoyed writing them.


Monday, November 9, 2009

Layering 101

I've always been a big fan of layering. Even more so when I started breastfeeding. There's just something so flexible and less matronly about mixing up textures, colors, proportions and items that appeals to this fashion-loving but now fashion-challenged new mom.

Finding myself in new territory where function HAD to take centerstage to fashion, I was at my wit's end trying to find outfits, particularly tops, that would function well for nursing, be comfy enough to wear on "baby duty", had a prolonged shelf-life (no maternity/nursing outfits please), and STILL be stylish.


Solution, layering.

I discovered that I got a lot of use out of several basic spaghetti strap tops in different colors with detachable straps by pairing them with regular (non-maternity, take note) wraparound and deep cowl-neck  (draped neckline) tops/dresses. The result was easy nursing access, belly coverage and a variety of color options and styles to play around with.

WHY THIS WORKS:
1. Wraparound top/dress
The loose top is both flattering to post-baby bulges and practical for quick breastfeeding situations. Plus this looks great over white shorts, capris, leggings or on its own--very versatile.

2. Camisole with detachable straps
The strappy camisole underneath gives extra security and coverage, I prefer to wear the ones with the built-in bra for easy dressing and comfort. (My strapless brassieres almost ALWAYS gave me painful clogged ducts at the end of the day. Ouch!) You can also switch up colors and come up with a whole new look--try a yellow camisole underneath matched with white shorts and strappy sandals.

3. Slim Bottoms
The trick to avoid looking too boxy with this outfit is to balance proportions--loose top, slim bottoms. Whether you choose to pair this with jeans or shorts, the key is to go for tight styles--you'll look leaner and more with-it.

4. Roomy bag
No diaper bags here! Just choose a regular handbag big enough to accommodate the baby's things and voila! hip practical style made easy. Just buy those diaper bag converters/organizers I've been seeing in baby stores for bottles etc.

5. Flats
A must for any mom, comfortable shoes that look great! Ballet flats, gladiator sandals and strappy thongs are great alternatives.

6. Kid-friendly Accessories
I am obsessed with accessories and love mixing and matching them to create different looks. With the onset of mommyhood, I had to give up some of my fave pieces to keep myself from bodily harm--dangling earrings and long necklaces begone! With this neckpiece and bangle, you get just the right balance of style and baby-friendly material (in this case, colorful resin is great) and the solid bangle is devoid of small pieces the baby can accidentally swallow. Plus they double as toys-on-the-go too!

*I also love pairing halter dresses with tie-neck strings and little cardigans. I found that feeding the baby in public places became less stressful when I wore these combos.


If you like this blog, please leave me a comment. I would love to hear from you! Thanks!

Wednesday, November 4, 2009

That Elusive Perfect Stroller

Once happily content with my older sister's 10-year-old Aprica Classic with its full-reclining seat, double direction handle and easy-to-get-to basket, I found myself hankering for one of those Graco travel systems with the carseat/stroller tandems. I imagined a cartrip where all I had to do was unbuckle my little cutie's carseat and easily plop it on the matching stroller and voila! two seconds later I'm trolling the malls. And all this with her STILL snoozing soundly!

I was a mom on a mission, and not necessarily the budget, for such a luxury.
My requirements were simple. Comfortable, long-lasting in both sturdiness and baby years, easily portable and, of course, stylish.

After vetoing the Quinny Buzz (below). Are you kidding? Thirty thousand pesos for a stroller (approximately $650)? I admit the baby looked comfy in it plus looks pretty sturdy, super cool-looking and can last her until she's four years old but those humongous back wheels and crazy price tag just makes this an easy no-no.

Then there's the Graco Travel System (the Graco Quattro in Townsend at left), my once dreamed of possession. Checking locally, the price of one of these carseat/stroller combos is approximately P22,000 (around $450). Granted, you get two for the price, with a little research it turns out that it's pretty bulky to travel with. With future plans to give our baby a few stamps in her passport, I figured an umbrella stroller would be a better option for a major purchase like this. Goodbye Graco.

Next up, the Maclaren XT and XLR. Okay, based on feedback from family, friends and seeing quite a number of these pricey prams cruising around in malls, the Maclaren brand seemed to answer all my requirements. Umbrella-type, check. Sturdy, check. Grows with baby, (depending on style) check. Stylish, check. Budget-friendly, un-check. But, hey, if this was going to last me through 2 more future kids, I was willing to bite the bullet.
Now, the Maclaren XT (shown at left in Damask) seemed to be the top pick, hitting all of my needs/wants but the XLR (below) doubles as a travel system! With a carseat adapter, this little umbrella stroller transforms into this mommy's dream! So hands down, this was my pick. But at approximately P21,000 (around $450) locally (without the carseat!), this was way beyond our budget.

Not to mention that the local stores, specifically Rustans, Mothercare, SM Department Store, have XLRs but do NOT carry the carseat adapter! (It's on Maclaren's online catalogue so where is it? I asked around and found out that it's only available in the US and some parts of the UK.)

So after checking the internet, I was able to find a brand-new XLR (with the carseat adapter) for a deal at P14,500 (at around $300, shown at right in Coffee/Marsh with the separate Recaro carseat which was not included). Thank God for generous relatives as well! (They shipped it to us as a gift.)
 
Anyway, the Maclaren XLR is a dream to maneuver through Manila's malls and feels pretty reliable off-road but I do have to say when the XLR was created it did not have petite 5'1" mommies on their minds. I love the full cover/visor perfect for those midday naps but dislike the fact that the little window available to peer into the cutie is too far down the canopy to really benefit a small Asian woman like me. I STILL have to scoot over to the front of the stroller to peek and see if she's finally sleeping. (The canopy pictured above has a zipper that further extends its coverage but makes it a stretch to peer into from pusher's standpoint).

The basket underneath also leaves much to be desired. Although pretty roomy for an umbrella type, it's impossible to get to when the seat is fully reclined forcing one to pull out bits and pieces through the side which my small hands still find challenging.

At this point, I'm thankful we have a really comfortable stroller my daughter loves to sleep in and steers like a dream in crowded malls but big consideration next time would be the height of the stroller, weight (this one weighs a hefty 21lbs with the attached hood and basket) and a tray for drinks and snacks. I had to buy the separate Maclaren Universal Organizer which is a neoprene mesh organizer with two cupholders and a deep mesh bag for baby's things when I realized it didn't have one--it was an additional $20.


Right now, I really want to check out the Japanese-made Combi strollers for a potential future purchase for my future kids. I tested a few of their styles at the mall and love its lightweight size (it's only around 11lbs.), smooth open/close feature, price (online this retails at only $89!) and low height--especially made for short and small-boned Asian mommies like myself (check out the Combi Flare in Edamame shown above). But I'm just not sure about its sturdiness, the cheaper models seemed really flimsy that the backs of the seats felt they only had cardboard as support. The higher end ones seemed more substantial though. We shall see.

*Check out the Marc Jacobs "Love Marc" limited edition Bugaboo stroller that Gwen Stefani uses for baby Zuma. Fierce! But just a wee bit too masculine for my little girly-girl.

*Tip: Shopping online is always GREAT! Amazon.com or Ebay have amazing deals--all their strollers were almost certainly 50% off of local prices.

If you like this blog, please leave me a comment so I'll know which ones to do more of. Thanks!